Wednesday, October 27, 2010

One Hour (or less!) Roasted Chicken


This recipe is my first attempt at providing a blog that’s “semi-homemade”. A good friend of mine, who despises cooking almost as much as she despises calamari, requested a semi-homemade recipe. So I have to admit right away that this recipe isn’t semi-homemade BUT this is definitely a component to a semi-home cooked meal! Serve it with some boxed side (Skywalker and I love cheesy broccoli Rice-A-Roni) and some Jazzed up Green Beans and you’ve got dinner on the table in no time with only one component made from scratch.
Quick tangent on the term “semi-homemade”. Unfortunately that term makes me think of Sandra Lee and sorry, but I don’t like her. I’ve seen her cooking show a few times. As you may have guessed, she creates meals with pre-made products. I have no qualms with her show. My issue has to do with a cookbook of hers that my niece owns. Some time ago, she decided she wanted to make a spaghetti recipe from aforementioned cookbook. Well let me tell ya, the measurements were WAY off. If I hadn’t been there to assist and realize how off it was, the recipe would have been a massive fail. Not cool for a new cook! Or really any cook for that matter. Yeah, sure, it’s probably not Sandra Lee’s fault. Heck maybe she even submitted the correct recipe and the editor or someone messed it up. But I have to blame someone and I blame her. Who said dislikes had to be rational??
Ok so back to this homemade component of a semi-homemade meal. Here’s what you’ll need (please excuse my chicken as it apparently needed a facelift). Begin by preheating the oven to 500 degrees. 


Once you remove the innards of the whole chicken, you’ll want to rinse it inside and out. Pat the chicken dry, rub it down with the olive oil and set aside. The next thing I did was chopped up the cloves of garlic. I wanted them to be small so I ran my knife through the minced garlic so it was a very fine mince. This would have been a good time to use a pilon. We’ll learn about those another time.  

After prepping the garlic, I combined all of the dry ingredients. There's oregano, the sazon packet, salt, pepper, paprika, cayenne pepper, crushed basil and adobo. Look how pretty it looks!


I wasn’t sure how to approach incorporating the garlic into the seasoning mix but I figured, I'll just add the garlic right in. So I did and mashed it up some more. Once again visions of a pilon danced through my head.


I then took the garlic spice mixture and rubbed it BENEATH the chicken’s skin. I wiggled my way into the legs, wings, all over. I wanted my chicken to be full of flavor so I made sure to get it wherever I could. I also put about ¼ of the mixture inside of the chicken cavity. Once the garlic spice mixture was all used up, I shoved green pepper into the chicken cavity. If I had onion, it would have been onion. But I had half a green pepper and it needed to be used, so used it was. Look, you can see up the chicken’s skirt! At this point I also sprinkled the chicken skin with some freshly ground pepper and Kosher salt.


So here’s the neat part. This almost 5 pound chicken will be done in and hour or less. You can use this technique and change up the seasonings to use whatever floats your boat. Once you’ve got your chicken all prepped and ready to go, stick it in a roasting pan BREAST SIDE DOWN. You may have learned this before but think about it. All that fatty dark meat will be releasing liquids as it cooks… which will run down the chicken towards the breast meat so it's sorta continually basting the chicken breast thus creating juicy goodness. I have yet to acquire a roasting pan so my lovely Dutch oven was put into use.

Roast the whole chicken for 15 minutes uncovered. Already we can see some changes after 15 minutes. There’s very little liquid at this point but baste as best as you can.


Lower the temperature of the oven to 450 and roast another 15 minutes, repeating the process of basting before resuming the roasting process.


Reduce the oven temperature to 425, baste the chicken and finish roasting for about 20 – 30 minutes. To ensure juicy, yet fully cooked chicken, I STRONGLY recommend a meat thermometer. You want the thigh meat to register 165 degrees. I cooked the chicken for 30 more minutes. Aight she a beaut???


I will say that while the breast meat was nowhere near dry, it wasn’t as juicy as I’d hoped. This is why I say check it at the 20 minute mark, depending on the size of your chicken. I’m willing to bet a cool dollar that I could have pulled it out five or so minutes early and hit perfection.


As it stands, Skywalker and I had some delicious chicken with a side of… you guessed it, cheesy broccoli Rice-A-Roni. 


Ingredients:

4.5 lb Whole Chicken
1/2 green pepper, de-seeded
1 packet of Sazon seasoning (equal to about 1tsp for substitution purposes)
1 tsp adobo
1/2 tsp black pepper
1/2 tsp paprika
1/2 tsp oregano
1/2 tsp crushed basil
3 garlic cloves, minced and mashed
1/4 tsp cayenne pepper

Directions:

  1. Preheat oven to 500 degrees.
  2. Rinse chicken thoroughly inside and out under cold running water and remove all fat. Pat dry with paper towels and coat with 1 tbsp of olive oil.
  3. Mix the salt, pepper, oregano, basil, paprika, adobo, sazon packet and cayenne pepper together.
  4. Add crushed/minced garlic to spice mix. 
  5. Rub mixture under the skin, all over the chicken and a small bit inside of the chicken cavity.
  6. Place halved green pepper into chicken cavity.
  7. Roast the chicken in the preheated oven for 15 minutes. Lower the oven to 450 degrees, baste the chicken and continue roasting 15 more minutes. Lower the oven to 425 degrees, baste the chicken and continue roasting for 20 to 30 minutes until a minimum internal temperature of 165 degrees is reached in the thigh area. 
  8. Let cool 15 minutes and serve.

Thursday, October 21, 2010

Sinfully Simple Alfredo Sauce


 This recipe is neither for the faint of heart nor for the food purist. You will not find a classic recipe, a low fat recipe or a complex recipe. I'm just trying to balance things out since my last recipe was so dang healthy.

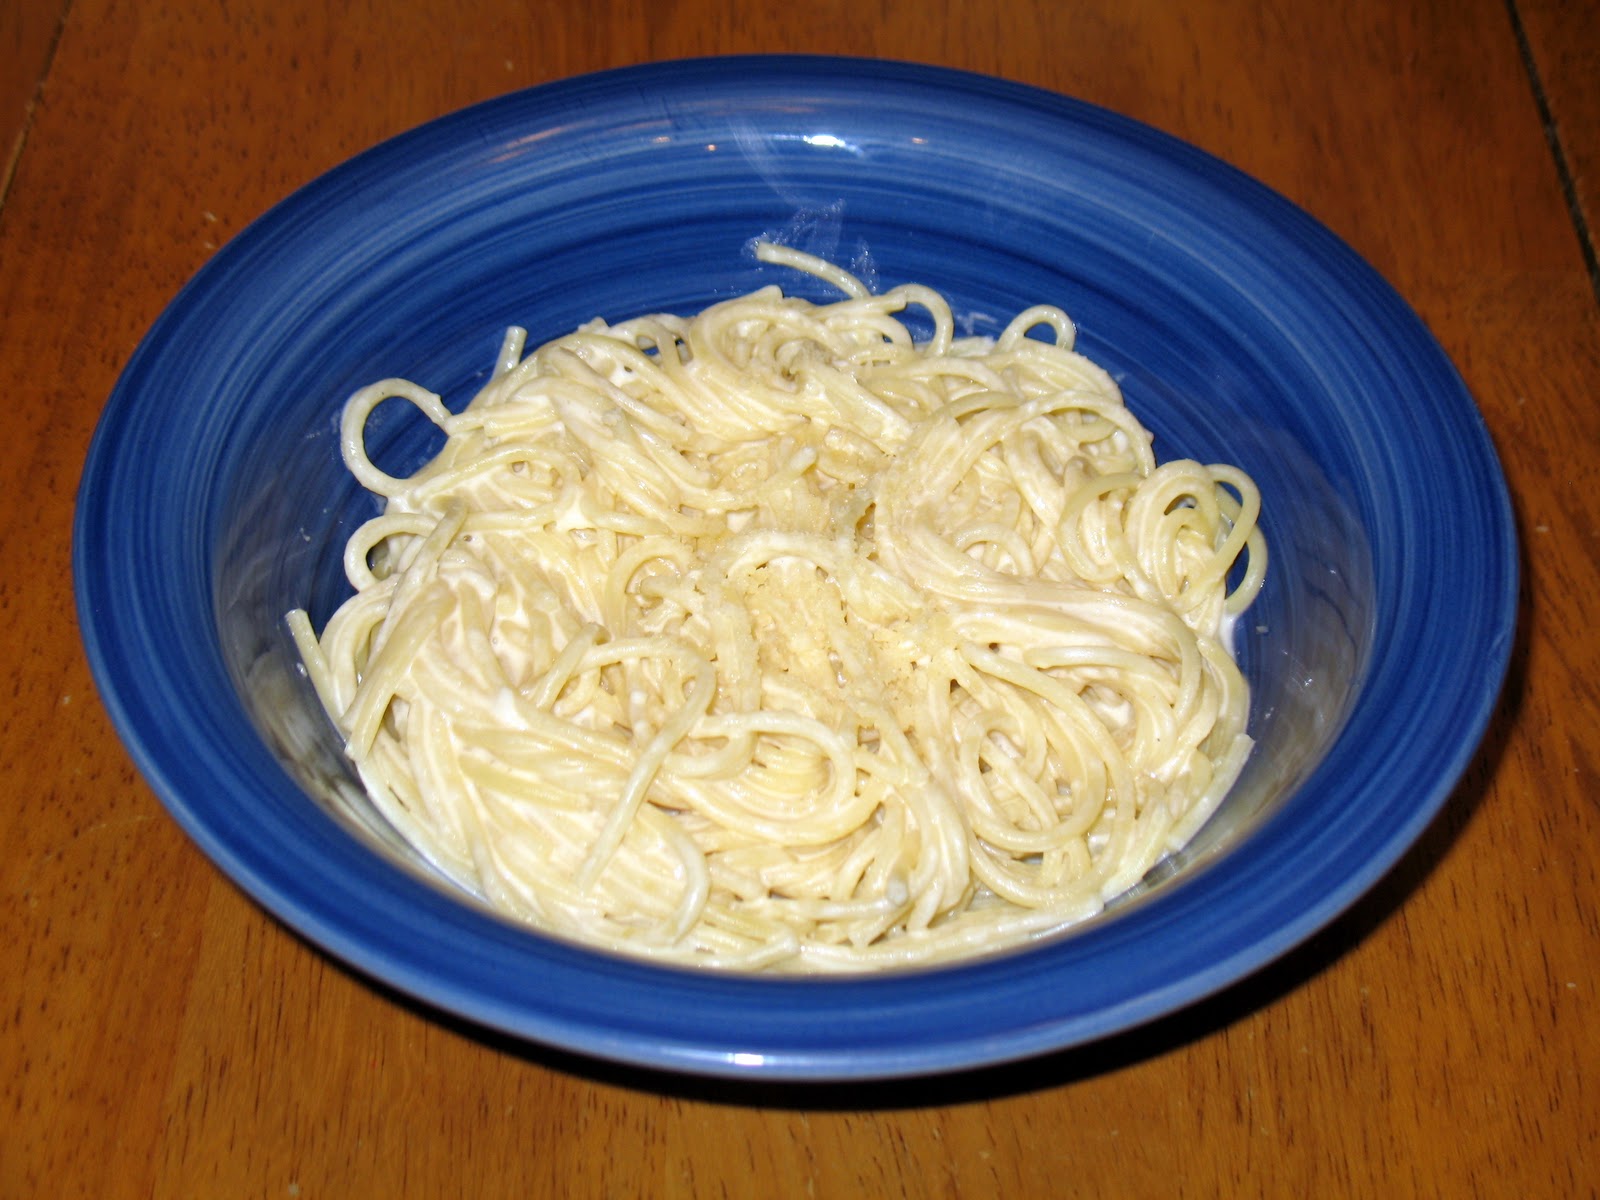
This is a simple sauce that you can make in a short amount of time. Get crazy with the sauce. Add vegetables, add seafood, add chicken. Use it as a base for a different twist for your next pizza or lasagna. It's so darn simple that it's worth making and throwing in your own special touches. For dinner tonight I simply tossed it with some pasta and served it as a side dish. I found this Quick and Easy Alfredo Sauce on Allrecipes. It had decent reviews and looked super easy so I knew I wanted to try it. I made a few slight changes. I made sure to buy a block of Parmesan to grate myself and instead of garlic powder I opted for fresh garlic. I doubled the original recipe so this made about 12 servings. The original recipe also says it makes 4 servings. Definitely closer to 6 meal (not side dish) portion servings. Well for a normal family anyhow. For my family the original recipe would make 6 side dish portion servings.


As you'll recall, I mentioned this recipe is not for the faint of heart. First thing you gotta do is melt some sticks of butter over medium heat. PHEW!!! That's a lot of butter!! My mom tried to talk me into using less but I refused. Alfredo sauce is supposed to be super fattening right??


Next I added in three cloves of freshly crushed garlic to cook a bit as the butter melted all the way down to a liquid state.

Once the butter was completely melted, I added 16 ounces (two small tubs) of room temperature cream cheese.


I used a whisk to break the cream cheese apart and start mixing it in with the butter. Quick word about this whisk. I was at my mom's house making this dish so I was using all of her kitchen supplies. I was leery about this whisk at first. I have a good old fashioned wire whisk at home that's firm. This nylon one was flimsy. Anyone who's used a nylon cake or muffin pan knows what I'm talking about. I should have known better than to doubt the nylon whisk. I love how great my nylon molds work and I fell in love with my mom's nylon whisk! Not only does it execute the job beautifully, there is no worry or concern wasted on scratching your pan. Yay nylon whisk!!!


Look how pretty it looks after the cream cheese has been thoroughly whisked and de-lump-ified. Actually it reminds me of cheesecake batter. Mmmm.... cheesecake. Ok, FOCUS!

Next I slowly whisked in the milk. I used 2% milk with zero issues. I used 4 cups total and initially added half a cup, thoroughly mixed in, added another half cup. About half way through I added more liquid at a time because the risk of lumps had passed.


Next was to add in the freshly grated Parmesan. The original recipe would have called for a cup and a half but I like even numbers so I added two cups total, half a cup at a time. THIS is the time to really make sure you're whisking. I wanted to make sure the Parmesan cheese melted completely into the sauce.


Once the Parmesan seems to be completely incorporated into the sauce, I added three shakes of nutmeg. One of the reviews on Allrecipes mentioned to do so and I figured I'd follow that advice! I also added in some black pepper at this point.


I then cooked and stirred and whisked for about 15 more minutes to allow the sauce to thicken into a nice consistency. Keep in mind that once it cools, as any melted cheese will do, it will thicken up. If this happens and it is too thick to your liking, simply add some hot milk until it returns to the desired consistency.


My biggest critics are the kids and they gave the dish a two thumbs up!! They totally scarfed it down so yes, I would say it was a success. Easy, fast, tasty... yeah, that's about my ideal dish. Oh and I did add a sprinkling of salt to my serving. No one else did but I'm a salt-a-holic. Also, the salt in the water for the pasta wasn't added in the beginning so I'm willing to bet had it been properly salted pasta water, I wouldn't feel the need to add any salt to the final dish.

Ingredients:
(Slightly modified from Quick and Easy Alfredo Sauce)
doubled = approx 12 servings

1 cup of butter
16 ounces cream cheese
12 ounces of freshly shredded Parmesan
3 cloves of garlic, crushed
4 cups of 2% milk
1 tsp of nutmeg
1/4 tsp of pepper

Directions:

  1. Melt butter in a non-stick saucepan over medium heat. Add crushed garlic while melting.
  2. Add cream cheese, stirring with wire whisk until smooth.
  3. Add milk, a little at a time, whisking to smooth out lumps.
  4. Stir in Parmesan about 1/2 cup at a time, whisking to maintain smooth texture.
  5. Sprinkle in nutmeg and pepper.
  6. Remove from heat when sauce reaches desired consistency.
  7. Toss with hot pasta to serve.
Thursday, October 14, 2010

Ful Medames


Skywalker is studying Egyptian history. What I really love about her teacher is she does not like reading out of the textbook. I appreciate her style of teaching because I was bored to tears in about 95% of my Social Studies classes. It was by far my least favorite class but that's just me. I did have ONE college professor who made the class interesting. So much so that 15 years later, I still have the textbook for that class. Oh man, I feel old all of a sudden.

Anyhow, so part of Skywalker's Egyptian studies requires the class to make an Egyptian dish to bring in for a potluck. I love being given inspiration to try to a new dish! I really wanted Skywalker to make the dish herself since I found a relatively simple one but she has Taekwon Do on Wednesday evenings and I was unable to find fava beans when I went looking on Tuesday. This dish is traditionally served for breakfast with a fried egg on top and a sprinkle of fresh parsley. I'm forgoing the egg and the parsley for the school dish.I figured fried eggs wouldn't be very appetizing hours after cooking and some of the recipes for this dish lacked parsley anyhow.

I searched for a good recipe and came across this one from Serious Eats (I read this blog regularly) but decided to work with this one from Allrecipes. In actuality I took information from numerous sources (vegan blog, reviewers tips, etc) in order to create this dish. Here's what I used to make a double batch.


I could not find fava beans. If I'd had more time I would have checked to see if there was a middle eastern specialty shop but I had to settle for a substitution. Lima beans and Butter Beans came up several times. I recalled something about using a bigger bean so I went with the Butter Bean.

The first task was to dice the onions. The recipe I was using most called for 2 large onions but it felt like a LOT of onions for two cans of beans!! So I kinda chickened out. I only bought one onion. Then I reconsidered because not a single reviewer said "too oniony" or "next time I'll reduce onion" so I scrounged up a half onion from the fridge to add to the dish. This picture does not do justice at the volume of onions.


I used my onion chopper again for two reasons. I was a bit short on time and I wanted the onions to be finely diced since this meal was going to be consumed mostly by kids. It was already going to be an odd dish to them so let me reduce the "ew" factor by masking the onions as best as possible. My onion chopper comes with two different attachments to have either a really fine dice or larger dice. I used the smaller dice for the onions.

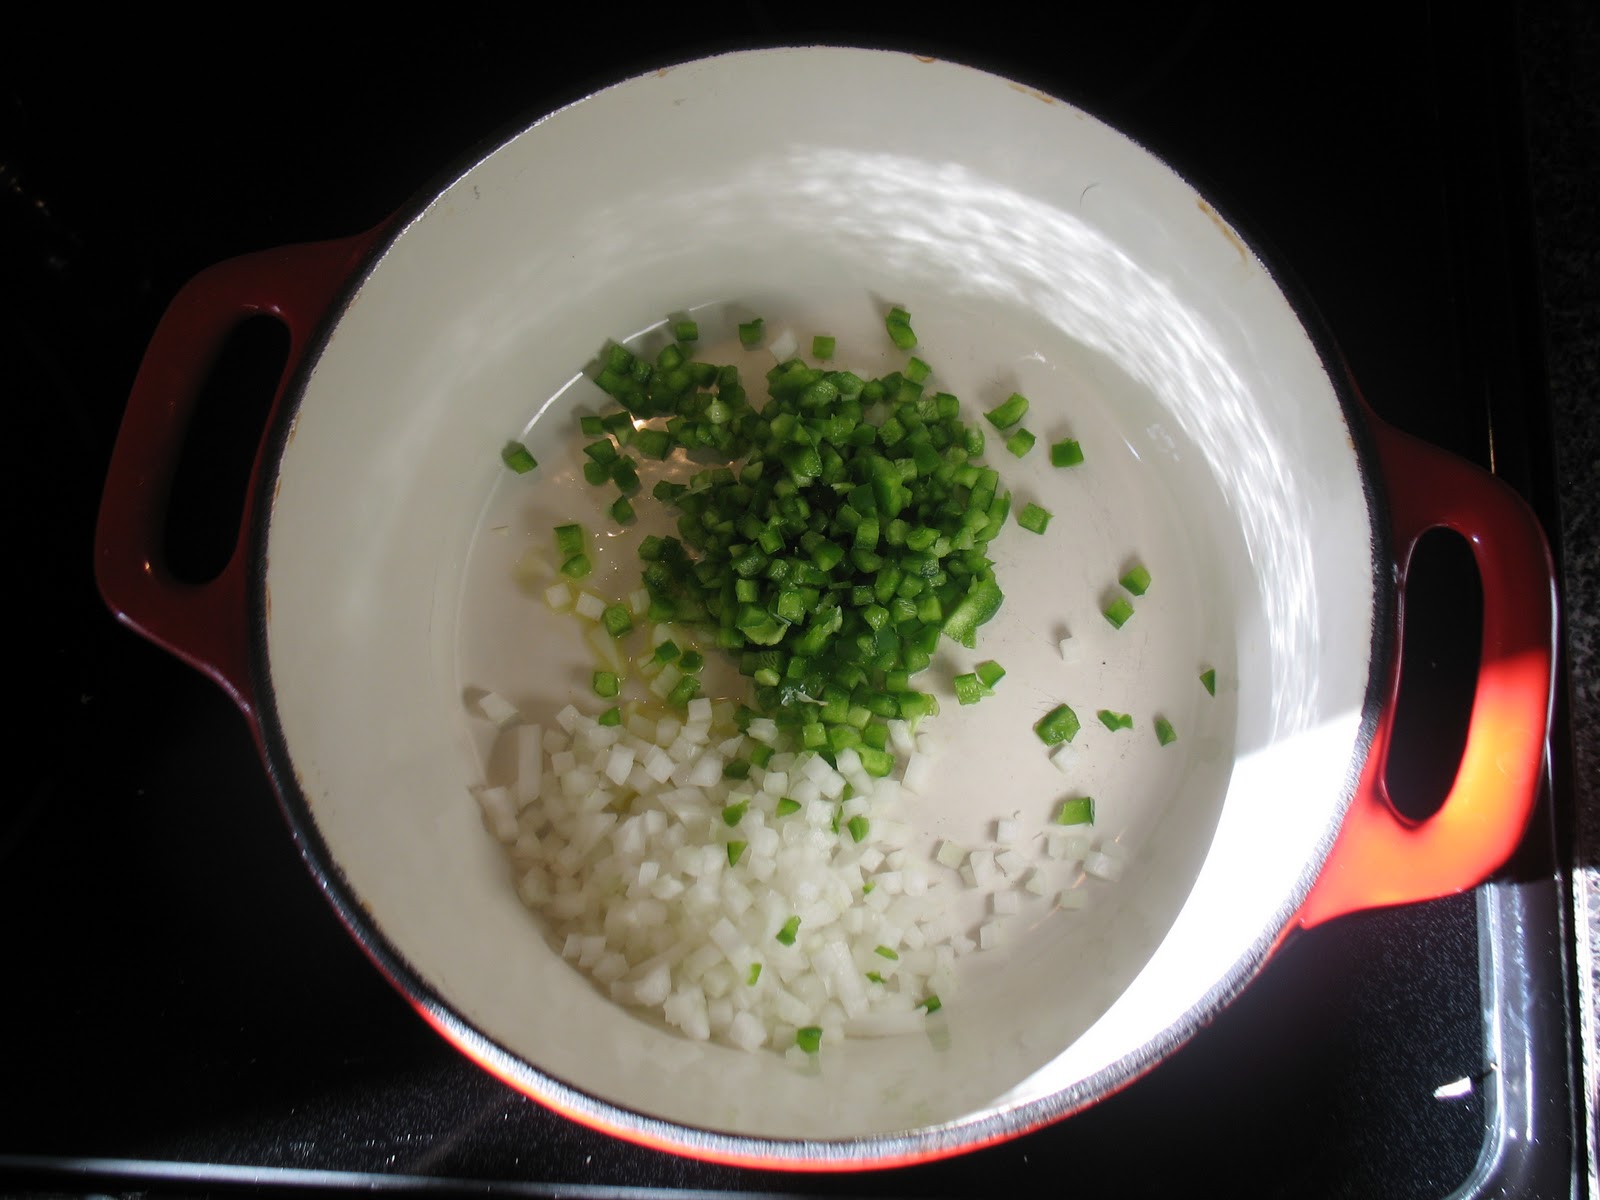
First I sauteed the onions in about 3 tablespoons of olive oil for several minutes over medium high heat.


As the onions cooked, I diced the tomatoes. First I sliced them into thick slices.


Then cut them into strips, lined the strips up and diced. Since I knew I would be cooking the tomatoes, I zipped through this process as I knew I wouldn't need to worry about a pretty dice for presentation's sake.


Once the onions were soft I added the tomatoes and sauteed for a few more minutes. As you can see, I really let the onions cook and soften up before adding the tomatoes.


While the tomatoes and onions cooked, I grabbed my garlic. I found some recipes that called for as much as five cloves for one can of beans so I was tempted to add more but since this was for "middle school kid" consumption, I decided to stay with six cloves total.


I prefer to smash my cloves with the side of my knife to prep them for chopping or smashing. You simply take the flat part of the knife, position it over one clove and just hit the blade with the palm of your hand to smash the clove a bit. Doing that makes removing the papery skin a cinch! For mincing garlic, I then cut into strips and then dice, similar to how I did the tomato. If the clove is really big and thick, I'll cut into slices, then strips and then proceed to dice.


After sauteeing the tomatoes for about 3 more minutes (or until soft) I added the garlic. With there being so very little liquid, I didn't want to take the chance of burning the garlic which is why I added the garlic about five minutes before I was going to add the beans. I also added 2 teaspoons of cumin, 3 teaspoons of Kosher salt, a healthy dose of freshly cracked pepper and about 1 tablespoon of Tahini sauce.


I let the mixture cook for about five minutes.I lightly rinsed the Butter Beans and then added them to the sauteed vegetables. Once dumping them in and stirring, I let the mixture cook for about five minutes. After the bean mixture cooked some, I started mashing the beans up with my wooden spoon and stirred occasionally. Keep in mind that there's very little liquid and we're cooking at medium to medium high heat so you want to stir regularly to avoid burning the mixture.


It was so tasty and of course it's got to be healthy right? That's my claim anyhow. The lemon I sliced into wedges to send as a garnish. Some recipes called for adding the lemon in and others called for adding it at the end with a sprinkle of freshly chopped parsley. Since I didn't want to use up a lemon wedge for my personal gluttony, I only tried the dish on some pita bread. Although I didn't eat them with fried eggs, I did finish the below serving for breakfast. Very filling and pretty darned scrumptious AND the kids loved the dish. Not a bit of it made it home.


Ingredients:
(Adapted from Fava Bean Breakfast Spread)

2 16oz cans of Butter Beans, drained and rinsed
1 to 2 onions, diced
2 tomatoes, diced
6 cloves of garlic, minced
3 tbsp olive oil
1 tbsp of Tahini sauce
3 tsp Kosher salt
2 tsp cumin
pepper to taste
fresh lemon juice as garnish
  1. Over medium high, add olive oil and the onions. Saute for 7 to 10 minutes, stirring regularly.
  2. Add the tomatoes, saute for 5 minutes. Add the garlic and spices then continue to cook for another 5 minutes. 
  3. Stir in the Butter Beans. After cooking for about 5 minutes, mash the beans with a spoon. 
  4. Cook for an additional 5 to 10 minutes. 
  5. Serve with fresh lemon juice squeezed over mixture and eat on pita wedges.

Wednesday, October 13, 2010

Jazzed up Green Beans

This is not really a recipe. What I mean to say is there's not much to this. The only reason I've decided to post this... tip (that feels like a better label for this) is because my friend T-Rae told me that ever since I shared this with her, she makes her green beans this way all the time.

I honestly can't remember if I learned this from my mom, but I'm giving her all the credit. At the very least if I didn't learn this from her, I inherited her inventive cooking skillz. Yes, I said skillz.

Okay, here's what you need.


Now don't go and make the mistake I did. 50% less salt?? Why!? Maybe that's just me, being a salt addict and all, but 50% less salt means I have to ADD more salt. Sheesh. I obviously wasn't paying attention when I bought this can of green beans. With a normal can of green beans you just use one chicken bouillon cube. You can dump that can of green beans in a small pot, add the chicken cube and heat the green beans through. Typically I like to give the green beans about 20 minutes on low just so they really absorb the flavor. If you're in a super big hurry, throw the green beans in a microwave safe container, add the chicken cube and I add a tiny bit more water just so the green beans are covered in liquid. Zap it for about 3 to 5 minutes, depending on your microwave. Let it stand for about five minutes which will allow the flavors to absorb a bit and help you avoid boiling your tongue.

With this particular can of green beans, since I was working with less flavor, I also added in a packet of this.


In fact, Skywalker prefers I use this seasoning packet when I make the green beans with a regular can of green beans. I'm not sure if it's the flavors she prefers or the fact that the green beans take on a reddish tinge. Blurry pic but you get the idea.


Still with words like this, you can't go wrong.


Thursday, October 7, 2010

No-Can-Allowed Sloppy Joes

Hey you! Yes you. I understand that you don't really cook much, if at all. But seriously, you can make this sloppy joe and avoid that canned starter nonsense that many first think of when a sloppy joe is mentioned. Truth be told, I don't think I've ever had sloppy joes before trying this recipe. The idea kind of repulsed me to be honest. I grew up on home cooking. My momma is Puerto Rican. Sure we've got some Americanized meals in the rotation but she never made us any sloppy joes. If you know me and we've talked food, you probably know I love finding recipes from Allrecipes. I love this site because it reviews the recipes AND you can sort the reviews by "most helpful" so you can see what others did that made it really tasty. That's where I found the recipe that I made yesterday, with a few changes of course. I first made this recipe years ago and it's been a while (as in three years) but for some reason I decided it was time to revisit the sloppy joe. Boy was Skywalker happy about that!

Below are the ingredients I thought I might use. I was short on the amount of ketchup I wanted to use so I thought I might just use that can of tomato sauce but I didn't. So just ignore that little fella. We'll just pretend he was there for moral support.


The first thing I did was dice up the onions and peppers. I had just over two pounds of ground beef so I wanted a "full" half cup of each.What do I mean by a "full" cup? It's piled a bit high when measuring it out.


Okay so typically I hand dice and why not? It's such a small amount it wouldn't have been too much work but I wanted it to be a small dice and I remembered my handy gadget! I first saw this little beauty at my mom's house. I used it and immediately was overcome with kitchen-gadget-envy. My mommy loves me and bought me one! Yay! I think you can use it for various things however I use it for onions about 95% of the time. So you there... the one that's averse to chopping onions? This gadget is for you.


Look how pretty and delicate that dice is?!? Honestly I could have added more onions and green peppers. Skywalker would have been none the wiser - they were so tiny! Next time I'm going for a full cup of each.


 Also, notice I added about a tsp of olive oil. I had the heat on medium and I wanted to cook the onions and peppers for about five minutes before I added the ground beef. I only used a tiny bit of olive oil because I knew once the ground beef was added, there would be plenty of fat.


After the onions and peppers were able to get a head start I added the ground beef and cooked it until it was brown. You want to make sure to stir and kinda chop up the ground beef so there are no big chunks. That will ensure it cooks evenly AND every single bit of beef will get coated in sloppy joe goodness. Small chunks are fine. Once the beef was brown, I drained the liquid. I drained it over a colander to catch any beef that fell out but I didn't dump all of the ground beef in there. I figured any remaining liquid wouldn't be a bad thing so I wasn't overly concerned with getting every drop out. Look at that cool plume of steam!!


Next I added the ketchup, garlic powder and brown sugar. This is also the step where you're supposed to add in mustard but I didn't have any. No regular mustard, no Dijon mustard, no Dijonnaise, not even any mustard powder! Honestly I figured I'd have SOME kind of mustard something to add but oh well. Next time.

Dear blogspot, please allow me to rotate pictures after upload.
Once you've mixed the ingredients in, you'll want to reduce the heat to low and simmer covered for 30 minutes. I bought kaiser rolls for my sloppy joes. I lightly spread butter on the inside of each bun half and toasted the bread. After the sloppy joe mixture had cooked through, I added about 1 tsp of Kosher salt and about 1/2 tsp of freshly ground pepper but basically you just salt and pepper to taste. I slapped that saucy, meaty goodness on my kaiser buns and ate the tasty mess! 


Easy. Tasty. AND you know exactly what's going into your sloppy joes. Make this for your kiddies. Make this for yourself. Just don't forget the napkins!

A handy tip to make life easier? Make a double batch and freeze the extra for future meals. One of the reviewers from Allrecipes recommended freezing the mixture in muffin tins. Makes for a perfect single sandwich serving. I decided to use my pumpkin shaped cupcake mold because it's my biggest silicone one.


I figured if it was a silicone type mold, it would be easy to remove. Tada!


Ingredients:
(Adapted from Sloppy Joes II)

2.25 lbs of ground beef
1/2 "full" cup onions
1/2 "full" cup green pepper
2 cups ketchup
2 tbsp brown sugar
1 tsp garlic powder
1 tsp olive oil
2 tsp yellow mustard (if you've got it!)
salt and pepper to taste

Directions:

  1. In a skillet over medium heat add 1tsp of olive oil, the onions and green peppers. Cook for about 5 minutes stirring occasionally.
  2. Add ground beef and cook until brown, stirring occasionally.
  3. Drain liquids and add in the ketchup, mustard, brown sugar and garlic powder. Mix thoroughly.
  4. Reduce heat to low and simmer for 30 minutes. Salt and pepper to taste.

Wednesday, October 6, 2010

Wildtree at Cajun Kountry Kitchen Cafe (CKKC)

Cajun Kountry Kitchen Cafe is a little restaurant that serves up BIG flavors. The chef, Chef Frisco, obviously has a passion for cooking and is also versatile and creative. The current location isn't the best so while the lunch crowd is strong, their dinner service is very slow. I've eaten there a couple of times and they even catered my niece's quinceanera so I speak from firsthand experience when I say they have some GOOD EATING!!

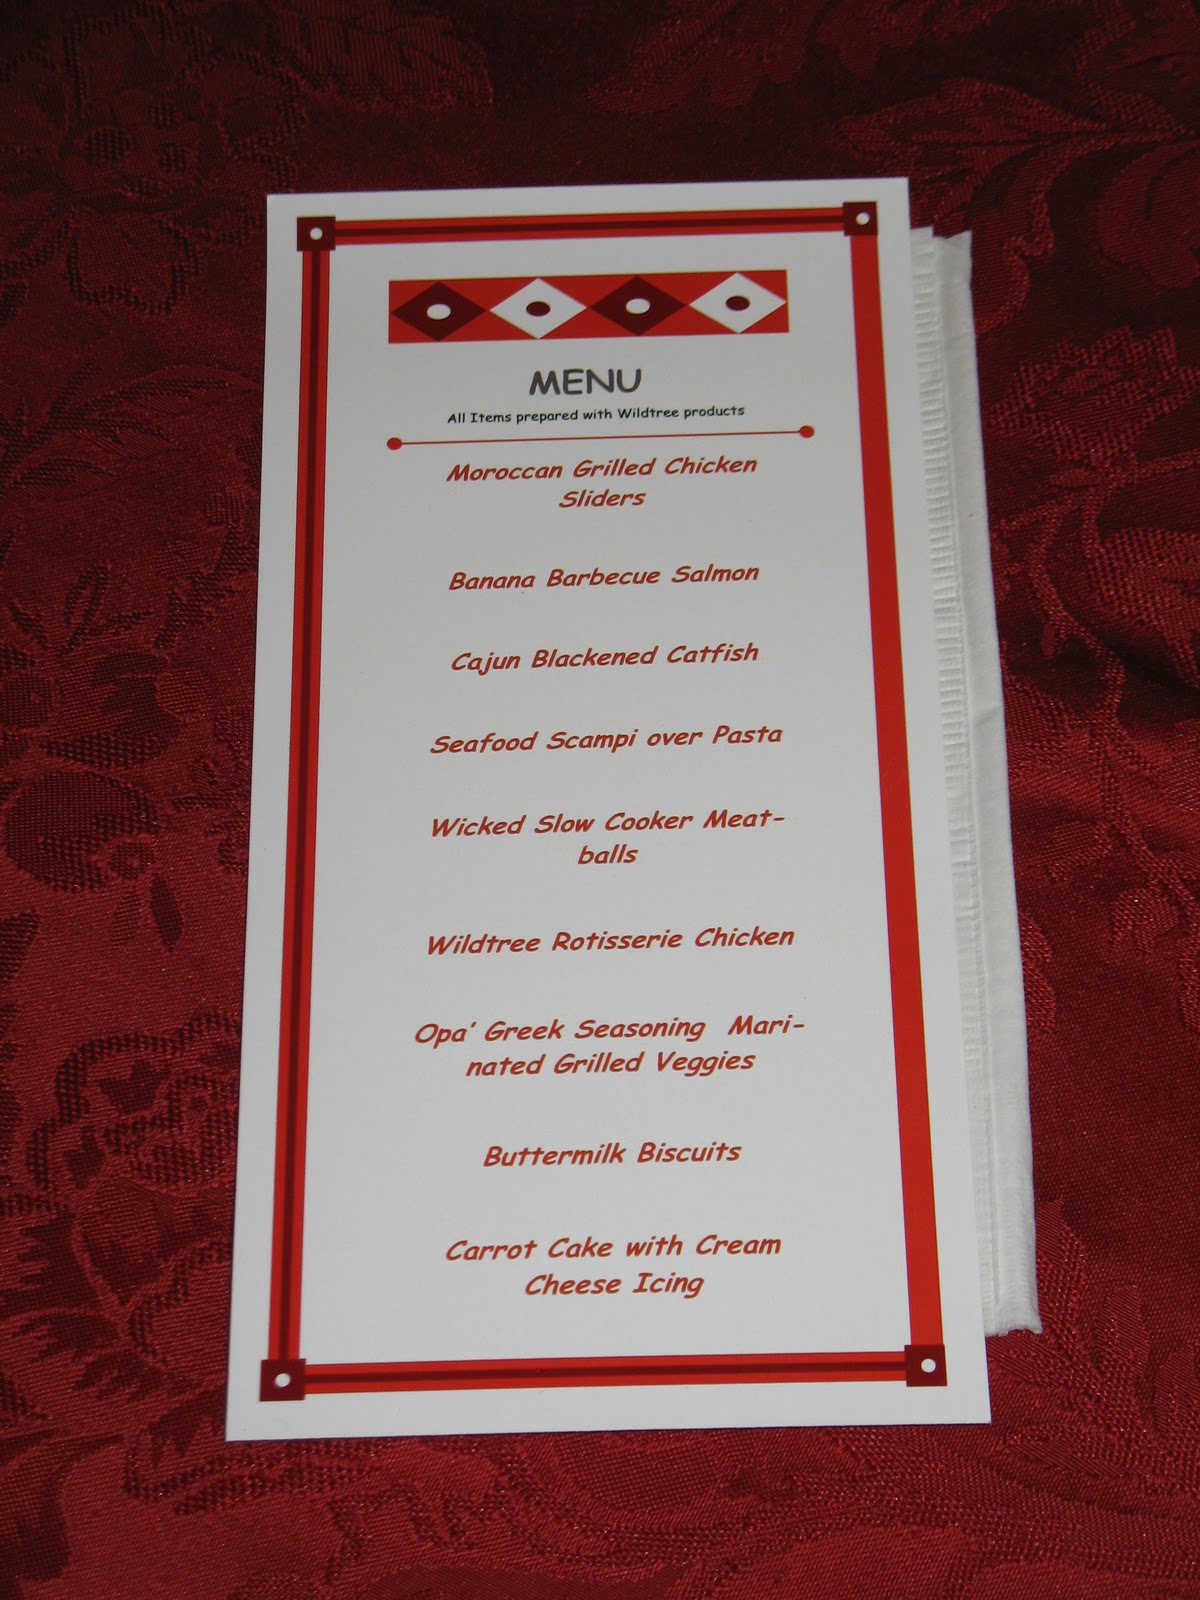
As some of you may have caught on, my sister-in-law is a Wildtree representative. If you're not familiar with Wildtree, they sell all natural herbs, grape seed oil, bread mixes, all sorts of stuff. The company started out as a way to offer busy parents a quick jump start to a  healthy meal. FancyPants, as Skywalker likes to call my sister-in-law, decided to do a Wildtree fundraiser at CKKC with all proceeds going to CKKC to help them out. She gave him some Wildtree products to use in creating the spread. The menu looked so good; I couldn't wait to start sampling.


First Chef Frisco shared with the attendees cooking tips.


I knew some of them already but I learned stuff too. Here's a pasta cooking tip: you don't need to add oil! The key to making sure pasta doesn't stick together is making sure you have enough water and space in the pot for the noodles. When the noodles cook, they release starch. If the pasta is too snug, that starch will make the pasta stick together. Also, before adding the pasta, you'll want to salt the water. This is really the only time to flavor pasta. I do the same thing that Chef Frisco advised us to do... make that water salty like the sea!
 

A second tip Chef Frisco shared was making sure to add a "flavor conductor" to all marinades. Most "flavor conductors" we are familiar with are things like oil and vinegar. Chef Frisco explained that without that conductor, all that fantastic flavor from any marinade won't make it INTO the cut of meat you are using so it is critical to add that component. Did you know that honey is also a flavor conductor?? Neither did I! Honey is made from bee's saliva and I'm sure we all know that saliva breaks things down so once Chef Frisco pointed that out, it all made sense. So honey, although it works a bit slower, is also a "flavor conductor".


 Throughout the tip sharing process, Chef Frisco also shared jokes and made us laugh. He's funny, personable and down to earth so even before we started stuffing our faces, we all were having a wonderful time. And don't get me started on his wife, Dana. LOVE HER!! Actually I think Dana and I got fussed at because we were so busy yakking it up and not paying attention when they were ready to start. Oops!

Once Chef Frisco shared some of his trade secrets, we were able to make our plates.


Sometimes looks are deceiving. Not in this case. Or maybe it was deceiving because it tasted BETTER than it looked!! Honestly, I'm certain that Chef Frisco could make cruddy ingredients taste good but man oh man, the creations he came up with using the Wildtree products?? Slap yo momma good!

Had to have a bowl of Seafood Scampi over pasta... of course. Chef Frisco actually went to Sam's and bought a bag of frozen seafood meant for paella. Then he used the Wildtree Scampi seasoning mix and butter to create the sauce. Just goes to show you that you can make a simple and delicious meal.


The Wildtree Rotisserie Chicken was juicy and super flavorful.


The Moroccan Grilled Chicken Sliders were beautiful little bites.


The Wildtree Carrot Cake Cups weren't overly sweet and so moist. They complimented the Cream Cheese frosting perfectly AND the frosting comes with the cake mix. How cool is that??


We all had a fantastic time, enjoy some wonderful food and helped out Cajun Kountry Kitchen Cafe just a bit.


If you're nearby, stop in and enjoy some of Chef Frisco's amazing culinary delights at CKKC! I promise you won't regret it.