Cajun Kountry Kitchen Cafe is a little restaurant that serves up BIG flavors. The chef, Chef Frisco, obviously has a passion for cooking and is also versatile and creative. The current location isn't the best so while the lunch crowd is strong, their dinner service is very slow. I've eaten there a couple of times and they even catered my niece's quinceanera so I speak from firsthand experience when I say they have some GOOD EATING!!
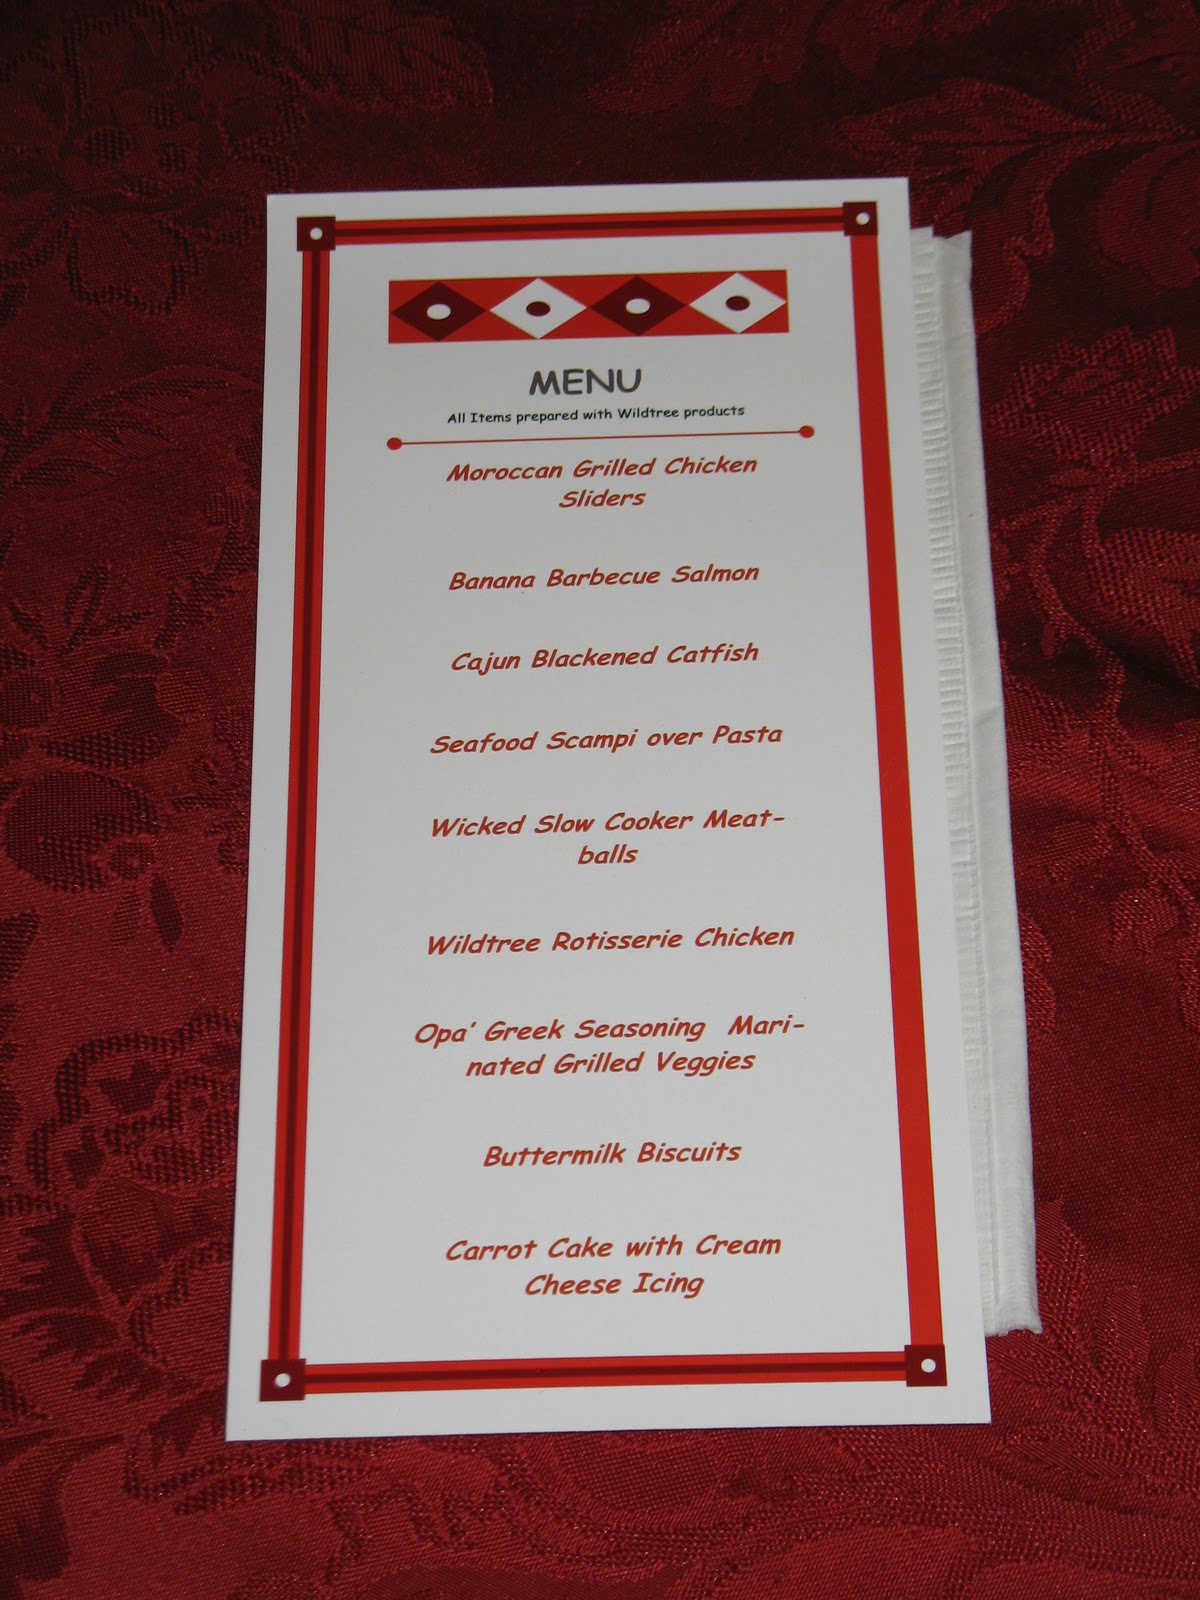
As some of you may have caught on, my sister-in-law is a Wildtree representative. If you're not familiar with Wildtree, they sell all natural herbs, grape seed oil, bread mixes, all sorts of stuff. The company started out as a way to offer busy parents a quick jump start to a healthy meal. FancyPants, as Skywalker likes to call my sister-in-law, decided to do a Wildtree fundraiser at CKKC with all proceeds going to CKKC to help them out. She gave him some Wildtree products to use in creating the spread. The menu looked so good; I couldn't wait to start sampling.
First Chef Frisco shared with the attendees cooking tips.
I knew some of them already but I learned stuff too. Here's a pasta cooking tip: you don't need to add oil! The key to making sure pasta doesn't stick together is making sure you have enough water and space in the pot for the noodles. When the noodles cook, they release starch. If the pasta is too snug, that starch will make the pasta stick together. Also, before adding the pasta, you'll want to salt the water. This is really the only time to flavor pasta. I do the same thing that Chef Frisco advised us to do... make that water salty like the sea!
A second tip Chef Frisco shared was making sure to add a "flavor conductor" to all marinades. Most "flavor conductors" we are familiar with are things like oil and vinegar. Chef Frisco explained that without that conductor, all that fantastic flavor from any marinade won't make it INTO the cut of meat you are using so it is critical to add that component. Did you know that honey is also a flavor conductor?? Neither did I! Honey is made from bee's saliva and I'm sure we all know that saliva breaks things down so once Chef Frisco pointed that out, it all made sense. So honey, although it works a bit slower, is also a "flavor conductor".
Throughout the tip sharing process, Chef Frisco also shared jokes and made us laugh. He's funny, personable and down to earth so even before we started stuffing our faces, we all were having a wonderful time. And don't get me started on his wife, Dana. LOVE HER!! Actually I think Dana and I got fussed at because we were so busy yakking it up and not paying attention when they were ready to start. Oops!
Once Chef Frisco shared some of his trade secrets, we were able to make our plates.
Sometimes looks are deceiving. Not in this case. Or maybe it was deceiving because it tasted BETTER than it looked!! Honestly, I'm certain that Chef Frisco could make cruddy ingredients taste good but man oh man, the creations he came up with using the Wildtree products?? Slap yo momma good!
Had to have a bowl of Seafood Scampi over pasta... of course. Chef Frisco actually went to Sam's and bought a bag of frozen seafood meant for paella. Then he used the Wildtree Scampi seasoning mix and butter to create the sauce. Just goes to show you that you can make a simple and delicious meal.
The Wildtree Rotisserie Chicken was juicy and super flavorful.
The Moroccan Grilled Chicken Sliders were beautiful little bites.
The Wildtree Carrot Cake Cups weren't overly sweet and so moist. They complimented the Cream Cheese frosting perfectly AND the frosting comes with the cake mix. How cool is that??
We all had a fantastic time, enjoy some wonderful food and helped out Cajun Kountry Kitchen Cafe just a bit.
If you're nearby, stop in and enjoy some of Chef Frisco's amazing culinary delights at CKKC! I promise you won't regret it.
Every post is about food... recipes, restaurant experiences, friends & food. If it relates to food, we will blog about it!
Wednesday, October 6, 2010
Thursday, September 30, 2010
Insanely Delicious Italian Drip Beef
Italian drip in the crockpot! In the past I wasn't a big proponent of the crockpot. There were few recipes that I tried and liked as I felt that everything usually comes out like a big pot of bland mush. Over the years though, I have learned that the crockpot is wonderful for very specific things. Dried beans come out fantastic after a day in the crockpot and I find it very convenient to throw a couple of pounds of chicken breasts in to cook and then shred for later use in various casseroles, enchiladas and chicken salad. Now I will add Italian drip beef to the rotation thanks to Pioneer Woman's recipe. It was fantastic, flavorful and it will conveniently feed a crowd.
First I threw the roast in the pot. Then I added chopped onion and garlic.
Next I dumped in three heaping tablespoons of Italian seasonings. Don't get scared. I did because it looked like a lot, but it came out great. Put in 1/3 of the jar of peppers and pour in 1/3 of the juices from the jar. Because of the peppers, I didn't put in black pepper, but I did shake in some salt. Lastly I poured in the can of broth, put the lid on, turned it to low and went to work. I timed myself and the whole thing, fridge to lid, took me 8 minutes and that included the time it took to take the pictures!
8 and some hours later I was home from work and the chuck roast had shrunk considerably. Not to worry. It was tender to the point of falling apart, and I helped it along by shredding it with two forks.
I took out the peppers just as a personal preference--wanting the flavor but not the bite. I buttered and toasted two buns, dumped on the meat, slapped on some provolone, and melted it in my toaster oven. At the point where I put some of the drippings in a bowl to use for au jus I realized that I never put in the 1/4 to 1/2 cup of water called for in the recipe. Again, no worries, it was fantastic.
Since I was the only one eating there was a ton leftover. After being in the fridge overnight I was surprised to see that there wasn't a lot of fat. The original recipe claimed there would be a lot of fat and that it should be skimmed off after being refrigerated but it also called for cooking in the oven or on the stovetop. I don't know if the lack of fat in my version was because of the crockpot cooking method, or just the cut of meat but either way it worked for me. Less fat, and so so so quick, easy, and convenient. Perfect for the next family visit.
Ingredients:
(Adapted from Italian Drip Beef)
3-4 lb Chuck roast
half an onion, cut into chunks
2 cloves of garlic, minced
1 tsp salt
8 oz jar Pepperoncini peppers
3 tbsp Italian seasoning
15oz can of beef broth
Directions:
- Add roast to slow cooker and top with the onions and garlic.
- Add to roast the Italian seasonings, Pepperoncini peppers and Pepperoncini juices along with a teaspoon of salt.
- Pour in the can of beef broth and cook on low for about 8 hours.
- Remove roast and shred with two forks.
- Serve on buttered, toasted bread. Top with cheese of choice and broil. Serve with a side of juice from the slow cooker.
~K-Bomb
Guilt-ridden Split Pea Soup
So there's a story behind the name of this soup. My co-worker, who we'll call PanDuh (he knows why) has a tendency to step on others' toes. He obviously is aware when he inadvertently upsets someone so as a mea culpa, he'll do something nice. Well recently he must have really smashed some toes because he ended up buying a ham from Honey Baked Ham. If you're familiar with Honey Baked Ham then you know that not only are they tasty, but they aren't cheap either! Well PanDuh's latest victim declined the ham (but hopefully accepted the apology??) so PanDuh left it for all of his co-workers to enjoy. After a few days of munching, I decided to take the ham bone home to make some soup. I thought about lima bean soup or black-eye pea soup but I settled on split pea soup. Honestly, I'm not even sure if I've ever had split pea soup before but for the most part I like beans so I figured with the right recipe, it's going to taste good! I found Alton Brown's recipe and decided that would be the one I would use with a few adjustments to incorporate the ham bone. The thing that I liked best about his version was that it used curry... I love curry! And if you've ever had honey curried chicken then you KNOW honey and curry go well together so I figured the ham bone would compliment this soup quite nicely. Here's what I needed for the soup.
Please notice the spanking new box of Kosher Salt!! Finally I don't have to face that poor, battered old box. I started the soup the night before by soaking the peas after going through them to make sure no rocks were in there. Who knew split peas grew in rocks!! Okay, that was cheesy. Anyhow, after soaking the peas overnight, I diced up the onion and garlic. Over medium low heat I melted the butter. Once melted I added the diced onions and a healthy pinch of salt. After cooking for about 3 minutes, you'll be ready to add the garlic and cook for another 2 minutes. You're actually sweating the onions and garlic so you want to make sure it doesn't sizzle and you definitely don't want the onions or garlic to brown.
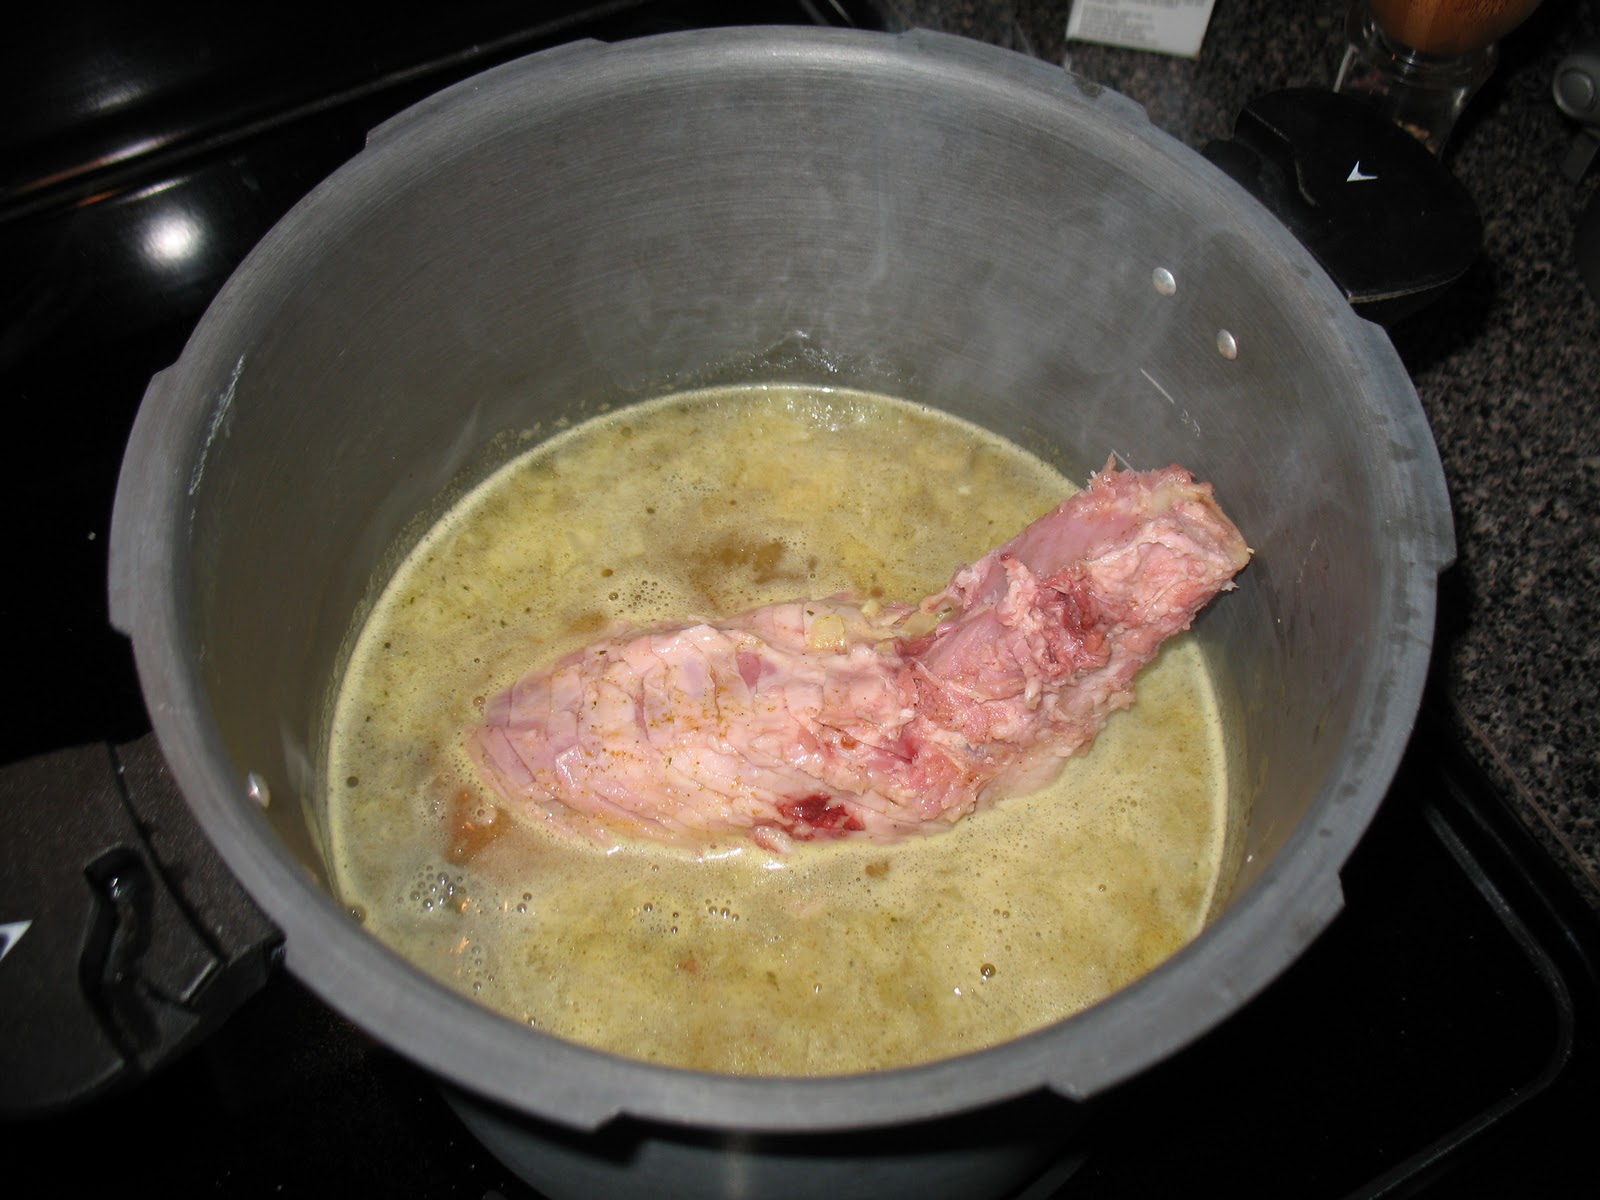
After the onions and garlic were properly sweated, I added the chicken broth, curry and split peas. Here's where the first part of my adjustment to the recipe comes into play. As usual, I didn't have any chicken broth. Why buy it when I can make it?? So I used three Knorr chicken cubes and seven cups of water. The recipe only calls for five cups of water but I also had a 16 ounce bag of split peas versus the 12 ounces the recipe calls for. So I figured 7 cups of water would prevent the extra chicken cubes and ham bone from making the soup too salty but it wouldn't dilute the split pea factor since I was working with more than the original recipe called for. Once I'd added the broth, curry and peas to the pot, I added the ham bone.
I brought the soup to a boil then covered and reduced to low to simmer for about a hour. After an hour had passed I pulled out the ham bone and set it aside. I noticed that there was still a good amount of meat on the bone so once it was cooled I would pull off the meat to add to the soup. In the meantime I used a blender to puree the soup mixture. This would be a good time to have an immersion blender! If you're working with a blender like I did, this will take about three or four batches. Don't fill it up too much and make sure to keep a a hand on the lid as the soup mixture may jump up some especially with it being warm. After each batch I poured the soup through a strainer into a container. Ideally if you have a cheese cloth you can pour the mixture through that so it ends up with a very smooth puree but I worked with what I had!
Once the entire soup was pureed I turned to the ham bone and picked off the meat. It was a decent amount! And look, you can see how the ham has really absorbed the curry coloring.
I added the meat to the completed soup and decided to store it in the fridge for a couple of hours in order to allow the fat to solidify at the top so it could easily be removed. Well guess what... barely any fat!!! It was a tiny, thin layer. Still, I removed it so I made a healthy soup even healthier.
So the real test would be Skywalker. We're talking about a green liquid... I'd force her to try it BUT would she like it?? I warmed a bowl up and crossed my fingers.
Not only did she like it, she LOVED IT!!! Once it was done, it was PERFECTLY seasoned which, if you know me, is a big deal. I'm a bit of a salt-a-holic but the flavor was so perfect the idea of adding salt just never crossed my mind. Oh and yeah, I never did get around to using any black pepper either.
Who knew guilt could produce great soup??
Ingredients:
(Adapted from Curried Split Pea Soup)
2 tablespoons unsalted butter
1 cup chopped onion
Kosher salt
1 tablespoon minced fresh garlic
16 ounces dried green split peas, picked over and rinsed
7 cups water
3 Knorr chicken bouillon cubes
1 tablespoon curry powder
Directions:
- Rinse and pick through split peas. Soak in water overnight.
- Over medium-low heat, melt butter in a pot (at least 4 quart). Add chopped onions and a healthy pinch of salt.
- Sweat the onions for about 3 minutes. Add minced garlic and continue cooking for about 2 minutes being careful to avoid allowing the garlic or onions to brown.
- Add the peas, chicken broth and curry powder. Stir to mix.
- Add ham bone then increase heat to high. Once boiling, reduce to low and simmer for about an hour.
- Puree soup with either an immersion blender or a regular blender, taking care to avoid hot splatters.
- Add salt if needed.
Wednesday, September 22, 2010
Sour Cream Banana Bread
There is no finer fruit than the banana. What other fruit can see potential in when rotten?? Bananas are similar to plantains in that they can be used in different ways in their various stages of the ripening process. A green, unripe banana is less sweet and can be used in a few ways. I have to admit I've never made anything with a green banana so maybe I'll challenge myself one day soon. A perfectly yellow, ripe banana can be eaten as is, sliced into cereal, enjoyed with a slather of peanut butter... you get the gist. An overripe banana means DESSERT!!! When I see overripe bananas I see banana bread, I see banana muffins, I see mini-banana cupcakes. All sorts of yummy baked goods. I was on a kick in which I baked various overripe banana goodies and had shared some with co-workers. One day my co-worker mentioned that he had some overripe bananas and his goal was to best my creation. By the way, that creation was this. And let me tell you, it was SO GOOD! In fact, because I love you, I will recreate that recipe one day soon so I can capture the process... recreating it has nothing to do with the fact that I'll get to enjoy it again. :)
Okay so back to my co-worker. So of course when I hear he has NINE overripe bananas I ask (okay, so I kinda begged) that he please bring me two so I can make something. He agrees and then the next day he hands over two bags of overripe bananas!!! I guess he decided trying to beat me at baking was futile and decided to throw in the towel before even trying. At first I was like WTF but then I got kind of excited and starting looking for overripe banana recipes to try out. I made some Banana Pumpkin mini-muffins, Oatmeal Banana bread and Banana Sour Cream Bread. I picked this Banana Sour Cream Bread recipe because of it's rave reviews. How could I not try it out?? So after setting the over to preheat at 300 degrees, here's what I gathered up to use.
I halved the original recipe because I wanted to make a couple of different banana bread recipes and figured two loaves of this one would be plenty. The first thing I did was spray my glass bread loaf pan with cooking spray. The next step is to mix 1/4 cup of sugar and 1 teaspoon of cinnamon. I set half aside and sprinkled the other half over the bottom of the glass bread pan. So here's a secret. I forgot to half that part of the recipe so it was twice as much as topping as each loaf was supposed to have. Was that a bad thing?? Nope! It gave the bread a nice, caramelized sweet bottom crust.
Next I threw the softened butter and sugar together. You don't add the eggs to this portion so it was a bit drier than when you mix butter and sugar together for cookies, for example. Just make sure you've got it pretty evenly mixed and you're good to go.
Into the mixing bowl I added the mashed bananas, eggs, vanilla and sour cream. In a seperate bowl I mixed the flour, cinnamon, salt and baking soda together. Once combined I added this dry mixture to the large bowl containing the wet mixture. Although I used my KitchenAid mixer to combine the sugar and butter, I hand mixed the other ingredients together as suggested in one of the reviews, which helped avoid over-mixing the batter. After adding about 1/2 cup of chopped macadamia nuts, I poured the batter into the sugar-cinnamon coated loaf pan and baked it for 1 hour and 10 minutes. Actually I'm pretty sure that 30 seconds shy of the end time something distracted me so it very well likely went over by ten minutes... oops! No matter, it was still very moist, very tasty and that crust was a nice and unexpected twist on banana bread.
I took one loaf into work (of course!) and I shared the other one with my family. It just so happened my mom was just getting back into town after being gone for what felt like forever so this bread helped make that day a mini-celebration. Everyone seemed to enjoy it at work as well... I know I sure did!
Ingredients:
(Adapted from Banana Sour Cream Bread)
2 tablespoons white sugar
1/2 teaspoon ground cinnamon
6 tablespoons butter
1-1/2 cups white sugar
2 eggs
3 very ripe bananas, mashed
1 (8 ounce) container sour cream
1 teaspoon vanilla extract
1 teaspoon ground cinnamon
1/4 teaspoon salt
1-1/2 teaspoons baking soda
2-1/4 cups all-purpose flour
2/3 full cup chopped macadamia nuts
Directions:
Directions:
- Preheat oven to 300 degrees.
- Combine ¼ cup of sugar and 1 tsp of cinnamon.
- Grease two bread loaf pans and dust each with half of the cinnamon and sugar mixture.
- In a large bowl, cream the butter and 3 cups of sugar together. Add the eggs, mashed bananas, sour cream and vanilla and mix until just combined.
- In a small bowl, combine cinnamon, salt, baking soda and flour together and then add to the large bowl mixture. Next fold in ½ cup of macadamia nuts.
- Pour batter into bread loaf pans and bake for 1 hour and 10 minutes.
Tuesday, September 21, 2010
Pico de Gallo Pilaf
(Adapted from Pico de Gallo Pilaf)
1/2 cup orzo
2 cups of chicken broth
1 tbsp olive oil
2 cups of Pico de Gallo
Directions:
- Heat 1 tbsp olive oil in large saucepan over medium heat.
- Add the orzo pasta and toast until deep golden brown, stirring continuously.
- Stir in rice and broth, bringing to a boil.
- Reduce heat to low and simmer covered for about 17 minutes.
- Once the rice is cooked, stir to fluff and mix in about 2 cups of the Pico de Gallo.
- Salt to taste.
Wednesday, September 15, 2010
Mexi-Fun at the Farm
Okay so T-Rae's house really isn't on a farm HOWEVER she's shared that land with chickens, ducks, geese, dogs, cats and a couple pigs for good measure. So compared to my humble one dog and one cat, her home is a farm! Plus it's on a lot of land so there's that whole "massive amounts of yard work" which is another reason I like to call it a farm. I enjoy going over to T-Rae's house because we both enjoy so many of the same things and have the same sense of humor. Plus there's ALWAYS food and wine involved so really, it's a perfect little mini-getaway for me. T-Rae invited us over so we could cook up some mexican delights. It started as an invite to cook and she had a yearning to make some black bean soup so the other dishes (for the most part) were picked to compliment that. Of course I also intended to take pictures and end up with a couple of recipes to blog about. Not all of the recipes will make it however there are some really fun pics so I decided to share!
I threw the Pico de Gallo together while at home and shortly after Skywalker and I arrived, I got to making the White Cheese Mexican Dip. After it was done we called the kids over to try it out.
That's Ms Alycat on the left and Skywalker holding Baby Bruce. Skywalker LOVES babies so anytime one is near she wants to hold him or her. As you can see, it was hard for everyone's grubby little fingers to resist the cheesy deliciousness.
The black bean soup was a tricky little sucker. We're busy moms. Who has time to think "hey, I might need to adjust the liquids since I'm not starting with dry beans." Yeah, duh moment but being the true cooks we are, we doctored that up into a DELISH soup! As far as the end recipe? No clue. :)
When Alycat said "mmmm, I like cheese!" I figured she was adding some to her black bean soup. When I looked up, I realized she had the bowl of cheese smack dab in front of her as the main dish to her side of soup! Ah the power of cheese.
Did I mention we had Carnitas with fresh Pico de Gallo and diced avocado?? Oh my heavens. Those suckers were GOOD. And that fruity drink on the upper right was some homemade Sangria. The first sip made me cough which is that key sign you know it's good and STRONG! It was super tasty and it was full of fruit so that automatically makes it super healthy as well. Right?!
The recipe said it made 10 servings but it was actually 10 MASSIVE servings. T-Rae and I tried but I'm not sure we put a dent in it LOL!
I threw the Pico de Gallo together while at home and shortly after Skywalker and I arrived, I got to making the White Cheese Mexican Dip. After it was done we called the kids over to try it out.
That's Ms Alycat on the left and Skywalker holding Baby Bruce. Skywalker LOVES babies so anytime one is near she wants to hold him or her. As you can see, it was hard for everyone's grubby little fingers to resist the cheesy deliciousness.
The black bean soup was a tricky little sucker. We're busy moms. Who has time to think "hey, I might need to adjust the liquids since I'm not starting with dry beans." Yeah, duh moment but being the true cooks we are, we doctored that up into a DELISH soup! As far as the end recipe? No clue. :)
When Alycat said "mmmm, I like cheese!" I figured she was adding some to her black bean soup. When I looked up, I realized she had the bowl of cheese smack dab in front of her as the main dish to her side of soup! Ah the power of cheese.
Did I mention we had Carnitas with fresh Pico de Gallo and diced avocado?? Oh my heavens. Those suckers were GOOD. And that fruity drink on the upper right was some homemade Sangria. The first sip made me cough which is that key sign you know it's good and STRONG! It was super tasty and it was full of fruit so that automatically makes it super healthy as well. Right?!
The recipe said it made 10 servings but it was actually 10 MASSIVE servings. T-Rae and I tried but I'm not sure we put a dent in it LOL!
Monday, September 13, 2010
Pico de gallo
I emailed my friend T-Rae and mentioned to her that I had a hankering for cooking up some goodies so those were my weekend plans. She suggested we get together and cook up a menu of yum-ness. She wanted to make a black bean soup so I suggested some carnitas and white cheese dip to accompany the meal. I took on making the pico de gallo to go along with the carnitas. I checked one of my favorite websites Allrecipes to look for a recipe and came across this one. Since the recipe's serving size was for 25 I halved the recipe, I used white onion because that's what I had and didn't use any black pepper. Other reviewers suggested using red wine vinegar and less oil than the recipe called for so I did that as well. I started with one bowl and kept adding the ingredients and stirring as I prepared the recipe.
I only needed 1 tablespoon of lime juice which one lime provided. One tip to remember when needing to getting citrus juice is before cutting into the fruit you'll want to roll it around to prep the fruit so you get the most juice possible. I typically roll it and press hard with the heel of my palm. For the one cup of cilantro, after rinsing, I roughly chopped about half of a bunch. You don't want to chop the cilantro too small. On a side note, I LOVE cilantro and never omit it from any recipe I'm making if I can help it. I was ready to kick myself because I was supposed to bring the remaining cilantro for the black bean soup and TOTALLY forgot it. I love cilantro so much that whenever I buy some fresh cilantro, I can't help but give it a big whiff!
Next go ahead and dice the onions and tomatoes. You'll want to dice both a similar size. The recipe says 1/4 of an inch but of course I didn't measure. I just eyeballed what I figured would be a good size and it worked beautifully. Since I was using Roma tomatoes, I sliced either end off, then sliced the tomato into thick slices, cut into three or four strips, then rotated and cut three or four more times across to create the dice.
Once the onions and tomatoes are diced I added them to the lime juice and cilantro. I saved the jalapeno for last. This was my first time working with a jalapeno. I decided to err on the side of wussy and used plastic gloves. I constantly touch my face and eyes and I just KNOW I would have ended with burning eyes if I didn't protect my hands. T-Rae shared with me that she likes to walk on the wild side and goes glove-free when using jalapenos AND she happened to mention that citrus juice worked beautifully in removing the jalapeno juices. I lopped off the top and bottom tip of the jalapeno and then made a slice lengthwise to open the jalapeno into one flat piece. I removed the white membrane and all of the seeds, sliced into strips and then minced the strips. Once the jalapeno was minced, I ran my knife through again to make it a fine mince. The photo below shows the result before the final knife run that resulted in a fine mince.
After adding the finely minced jalapeno to the mixture, I finely mince and add about 2 cloves of garlic, 1/4 cup of red wine vinegar and l/8 or so of a cup of vegetable oil. I added a tablespoon of salt which kind of scared me! It just seemed like a lot and this is coming from a salt-lover. No worries though, it was definitely no where near salty much less too salty. I added 1 teaspoon of cumin which wasn't a part of the original recipe and thoroughly stirred the mixture to make sure the spices were evenly distributed. The end result was BEAUTIFUL! The below picture was right after I finished making it. Of course you'll want to make it a couple of hours before you plan to eat it because that gives the flavors time to really meld. After a few hours the mixture created much more liquid.
This was not only super pretty but the PERFECT accompaniment to the carnitas and really the possibilities are endless for this pico de gallo. I think though next time I make it, I'm going to omit the oil completely and see how that goes.
Ingredients:
6-7 Roma tomatoes
1/2 white onion
1 cup chopped cilantro
1 lime, juiced
1 jalepeno
2 garlic cloves, finely diced
1/4 cup of red wine vinegar
less than 1/4 cup of vegetable oil (or omit completely!)
1 tbsp of salt
1 tsp cumin
Subscribe to:
Posts (Atom)